The Nokia Nseries imaging devices are very intelligent. In
nine cases out of ten, the automatic settings will give you
a very good result. But no camera knows what your intention
is, so to get the one shot in ten right (and to score excellent
for the other nine) you need to know a bit about how the camera
thinks.
Resolution
Resolution determines the sharpness of an image. The pixel
count determines the geometric resolution and tonal dynamic
range of the image. The optical resolution or lens determines
the clarity, focus and contrast of the information provided
to the image capture material. The dynamic range (tonal shadow
and highlight detail), colour fidelity and over-all sharpness
of the image are its resolution.
| Resolution |
Advantage |
Disadvantage |
| High |
More detailed picture |
Large file |
| Low |
Small file |
Less detailed picture |
|
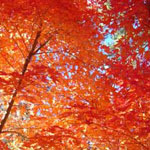
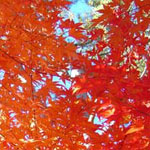
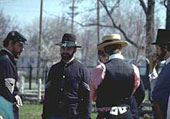
A low resolution shot can look as good as the bigger file when it's shown on a small screen:
 |
 |
 |
| High Resolution |
|
Low Resolution |
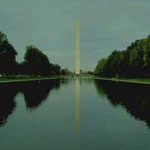
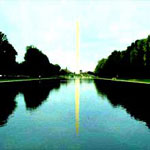
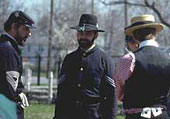
But a printout will show the difference:
 |
|
 |
| High Resolution |
|
Low Resolution |
The resolution of the image can be changed in the menu:
Choose Options > Settings > Image quality > Print email or MMS
Use:
High resolution for prints
Low resolution for MMS
If in doubt, use high resolution; you can even make a low-resolution copy to send while you keep the high-resolution version to print out later.
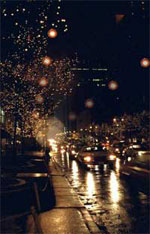
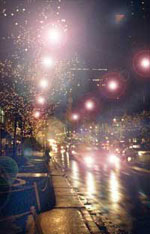
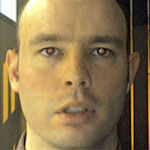
Light conditions/White Balance
There's a big difference between daylight and artificial light. A tungsten light bulb emits a rather yellowish light compared with the sun. And even the colour of daylight changes constantly during the day. For example, towards sunset the light turns pinky-red.
When you take a picture you have two modes to choose from:
- Automatic: the camera tries to select the setting that it thinks matches the light conditions
- Manual: you choose the setting for the light conditions (sun, cloudy, incandescent or fluorescent)This setting influences the colour of the image.
The picture taken in automatic mode gives a fairly good result but in fluorescent mode the colours are more realistic to the original. Other modes result in unrealistic colours.
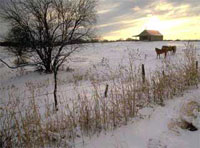
Exposure
Automatic exposure will give correct exposure nine times out of ten. But, if you've got large areas of white or black in a scene, it's best to use the Manual settings. If in doubt, look at the subject and compare what you see with what the viewfinder shows.
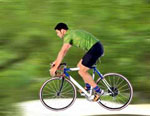
Zoom
There are two types of zoom - digital and optical.
- The optical zoom uses the lens to enlarge the picture. There is no drawback from a quality point of view.
- The digital zoom simply expands the existing image; the quality of the image is degraded.
 |
|
 |
|
 |
| Wide Angle |
|
Optical Zoom |
|
Digital Zoom |
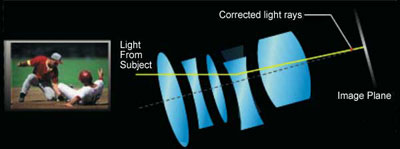
Focus
The process of bringing one plane of the scene into sharp focus on the image sensor:
- In focus: clear; distinct; sharply defined.
- Out of focus: indistinct; blurred; not sharply defined.
Advice:
- Always focus.
- When you take a picture of a person, focus on the eyes.
Nokia imaging devices have no manual focus adjustment. It will always focus on the nearest object. Minimum distance for accurate focus is about thirty centimetres (one foot) for normal settings - about five centimetres (two inches) in close-up mode. If you want to focus on something further away than the nearest object, pan away to remove the foreground from the viewfinder and press the 'shoot' button LIGHTLY. When the little green indicator on the right of the screen goes steady ("I have focus"), pan back to include the foreground and press the button fully. Image stabilizer The Image Stabilizer adjusts the lens to compensate for small movements of the camera.
Image stabilizer
The Image Stabilizer adjusts the lens to compensate for small movements of the camera.
|