MobiFilm Academy
Lesson 1 - Digital Photography Basics
 
Lesson 1 - Basic Camera Tips
Play Online Video
Download Video  
Printer-Friendly Version
   
Podcast video: Shooting Without Limits
  Watch Video
Subscribe to Podcast via iTunes   View video in flash player
 
Considerations
When shooting –still or video – you need to consider two main aspects: the technicalities and the aesthetics.
Technical

The Nokia Nseries imaging devices are very intelligent. In nine cases out of ten, the automatic settings will give you a very good result. But no camera knows what your intention is, so to get the one shot in ten right (and to score excellent for the other nine) you need to know a bit about how the camera thinks.


Resolution
Resolution determines the sharpness of an image. The pixel count determines the geometric resolution and tonal dynamic range of the image. The optical resolution or lens determines the clarity, focus and contrast of the information provided to the image capture material. The dynamic range (tonal shadow and highlight detail), colour fidelity and over-all sharpness of the image are its resolution.

Resolution Advantage Disadvantage
High More detailed picture Large file
Low Small file Less detailed picture


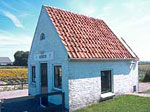
A low resolution shot can look as good as the bigger file when it's shown on a small screen:
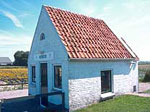
High Resolution   Low Resolution

But a printout will show the difference:
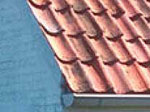
High Resolution   Low Resolution

The resolution of the image can be changed in the menu:
Choose Options > Settings > Image quality > Print email or MMS

Use:
High resolution for prints
Low resolution for MMS

If in doubt, use high resolution; you can even make a low-resolution copy to send while you keep the high-resolution version to print out later.


Light conditions/White Balance

There's a big difference between daylight and artificial light. A tungsten light bulb emits a rather yellowish light compared with the sun. And even the colour of daylight changes constantly during the day. For example, towards sunset the light turns pinky-red.

When you take a picture you have two modes to choose from:

  • Automatic: the camera tries to select the setting that it thinks matches the light conditions
  • Manual: you choose the setting for the light conditions (sun, cloudy, incandescent or fluorescent)This setting influences the colour of the image.
Automatic   Fluorescent

The picture taken in automatic mode gives a fairly good result but in fluorescent mode the colours are more realistic to the original. Other modes result in unrealistic colours.


Exposure

Automatic exposure will give correct exposure nine times out of ten. But, if you've got large areas of white or black in a scene, it's best to use the Manual settings. If in doubt, look at the subject and compare what you see with what the viewfinder shows.

Automatic   f-0.5


Zoom

There are two types of zoom - digital and optical.

  • The optical zoom uses the lens to enlarge the picture. There is no drawback from a quality point of view.
  • The digital zoom simply expands the existing image; the quality of the image is degraded.

Wide Angle   Optical Zoom   Digital Zoom


Focus

The process of bringing one plane of the scene into sharp focus on the image sensor:

  • In focus: clear; distinct; sharply defined.
  • Out of focus: indistinct; blurred; not sharply defined.

Advice:

  • Always focus.
  • When you take a picture of a person, focus on the eyes.

Nokia imaging devices have no manual focus adjustment. It will always focus on the nearest object. Minimum distance for accurate focus is about thirty centimetres (one foot) for normal settings - about five centimetres (two inches) in close-up mode. If you want to focus on something further away than the nearest object, pan away to remove the foreground from the viewfinder and press the 'shoot' button LIGHTLY. When the little green indicator on the right of the screen goes steady ("I have focus"), pan back to include the foreground and press the button fully. Image stabilizer The Image Stabilizer adjusts the lens to compensate for small movements of the camera.
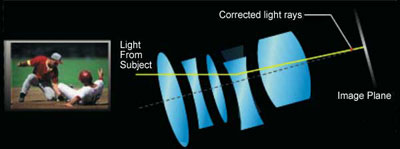

Image stabilizer

The Image Stabilizer adjusts the lens to compensate for small movements of the camera.

Back To Top Top
Settings
Image Scenes
Scenes are predefined sets of settings to suit specific conditions. Modern digital cameras have many adjustments, but if you only have a few seconds to get ready for a shot you can use one of the presets. If the 747 is about to take off, you can't tell it, "Hang on a minute; I'm just checking the light". Use the Sport mode.


Sport

This is the best mode for shooting sporting events (and airliners taking off). It uses the fastest shutter speed possible.

Automatic   Sport

Sometimes the very sharpness of the image can be a disadvantage. To get the best of both worlds, try panning with the moving object. You can now see the cyclist clearly, but the background is blurred:

Sport plus Pan


Close-up

Use the close up mode so all the detail is in focus.

Automatic   Close Up


Night

This is the best mode for evening and night scenes. This mode allows you to take shots where the shutter speed can be up to 3 seconds.

Automatic   Night


Portrait

This is the best mode for shooting portraits. Skin tones are shown beautifully and the overall tone is soft.

Automatic   Portrait


Landscape

This is the best mode for shooting scenery in daylight and provides crisp, clear shots of scenery such as buildings and mountains.

Landscape

Purists say that a good photograph should have three distinct planes. This one seems to have four!

Back To Top Top
Light conditions/Flash
Use the flash when the subject is not adequately illuminated.

Flash mode Camera Use
Automatic The camera decides on current scene conditions Use this mode for ordinary shots.
Force The flash always fires Use this flash mode to photograph backlit scenes, such as a subject against a window or in the shade of a tree, or to obtain the correct colours when you are shooting with lighting such as fluorescent tubes. In this mode, the flash fires in bright as well as dark conditions.
Red eye The flash fires a pre-flash just before the picture is taken. Use this mode to ensure that the subject's eyes appear natural when photographing people in low-light conditions.
No No flash Use this mode to take the picture using only the available, natural light.

Built-in LED flashes lose their effectiveness past 1,5 meters (5 ft). Make sure that the subject is within range of the flash. Don't forget the night scene option.


Red eye reduction

The left picture is photographed with the flash in Automatic mode. The red eyes are very noticeable. The right picture is photographed with the flash in Red Eye Reduction mode. The first flash causes the irises in the subject's eyes to close part way. When the flash fires again to take the actual picture, the reflection of the inside of the subject's eyes is almost invisible. The eyes look much more natural.

Flash automatic   Flash with red eye reduction
Back To Top Top
Edit Your Pictures
There are many things you can do to enhance your basic shots.


Colour tone

Many cameras offer colour mode options, which allow you to take pictures in black & white, sepia, and negative.

Normal   Black and White   Sepia   Negative
Action: Options > Edit > Options > Apply effect > select sepia or black & white or negative.


Rotate
Use this effect to rotate the image. But take the cat out of the dryer first!

Original   Rotate
Action: Options > Edit > Options > Apply effect > select rotate left or rotate right > select Ok.


Sharpen
Sharpen is a very useful feature for pictures that are slightly out of focus.

Original   Detail original   Detail sharper
Action: Options > Edit > Options > Apply effect > select Sharpness > Move up or down to modify > select Ok.


Set Contrast
Contrast is the difference in brightness between the lightest and darkest tones in a picture. A picture with too much contrast has highlights (lighter tones) that are too bright and show few details, shadow areas that are too black, and too bright with unnatural-looking colours in between. A picture with too little contrast looks dull, with muted colours, greyish highlights and no true blacks. Use this effect to change the contrast of the image.

Original   Increased contrast   Too much contrast
Action: Options > Edit > Options > Apply effect > select Contrast > Move up or down to modify > select Ok


Crop

Use this effect to cut out unwanted parts of the image

Original   Cropped to exclude man on right
Action: Options > Edit > Options > Apply effect > Crop. A cross appears on the upper left corner of the image. To move the cross, and select the area to be cropped, move the joystick. Select Set. Another cross appears on the lower right corner. Select the area to be cropped again and select Crop.


Set Brightness

Use the brightness or exposure adjustment to change the overall brightness of a picture. You can lighten a picture that's too dark, or darken one that's too light. Use this effect to improve an under or over exposed picture.

Original   Brighter   Too bright
Action: Options > Edit > Options > Apply effect > select Brightness > Move up or down to modify > select Ok.


Frame

Use this effect to put the image in a frame.

Original   With Frame
Action: Options > Edit > Options > Apply effect > select Frame > Move left or right to chose a frame > select Ok.


Text

Use this effect when you want to add text to the image.

Action: Select Options > Edit > Options > Apply effect > Text. Enter the text and select Ok. To edit the text, select Options > Move, Resize, Rotate, or Select colour > select Ok.


Clip art

Use this effect to insert a clip into the image.

Action: Select Options > Edit > Options > Apply effect > Clip-art. Select the item you want to add from the list and press the joystick. To move, rotate, and change the size of the item, select Options > Move, Resize, or Rotate > select Ok.


Cartoonise

Use this effect to give your picture a cartoonised image.

Original   Cartoonised
Action: Options > Edit > Options > Apply effect > select Cartoonise.


Red Eye Reduction

Use this effect to reduce the red eyes in the photograph to ensure that the subject's eyes appear more natural.

Original   With Red Eye Reduction
Action: Select Options > Edit > Options > Apply effect > select Red eye reduction. Move the cross onto the eye, and press the joystick. A loop appears on the display. To resize the loop to fit the size of the eye, move the joystick. Press the joystick to reduce the redness > select Ok.
Back To Top Top
Nokia
Tell Your Friend Sign up for MFM news